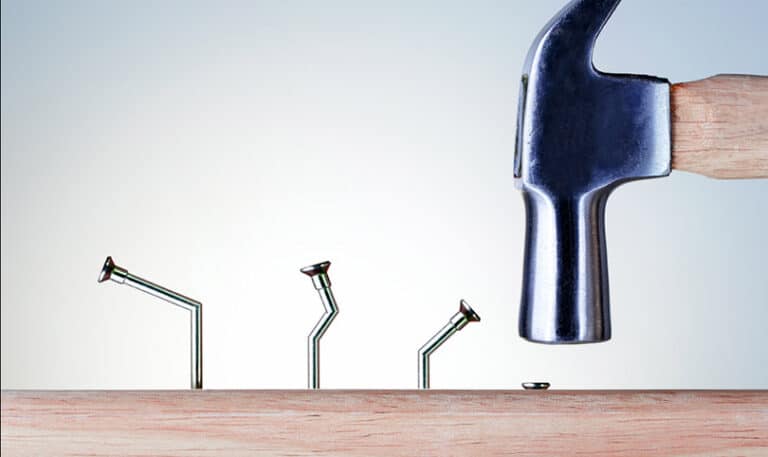


By the time the inspector arrives, you want confirmation that the job is ready, not a new problem that stops the next trade.
That starts with your own site inspection: a check that the work matches the approved plans and local requirements, while everything the inspector needs to see is still accessible.
When you are running several jobs, though, you cannot personally check every wall, rough-in and foundation pour. You need to know that whoever walks the site follows the same process, captures the right evidence and closes corrections before work moves forward. A site inspection checklist is the shared phase-by-phase record that keeps those checks consistent across your team and every job.
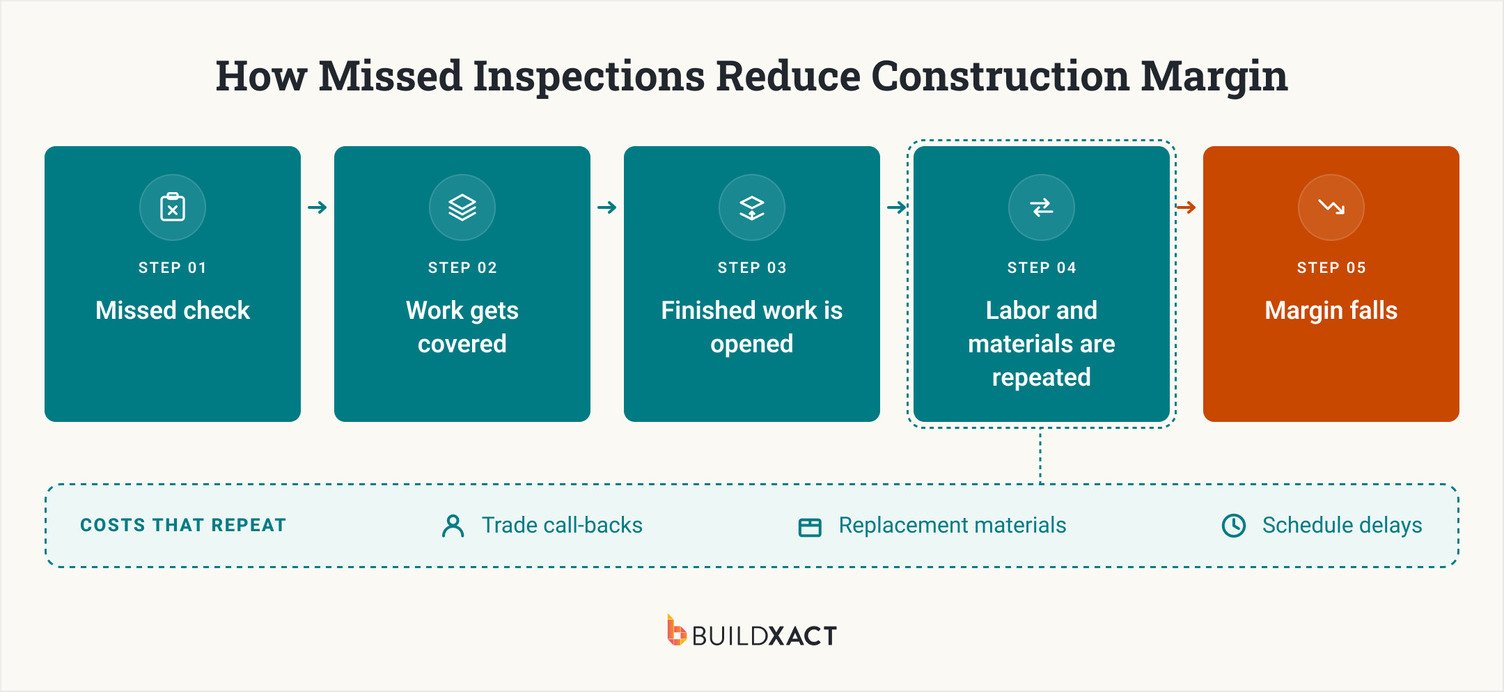
The process matters most before the pour, after the rough trades, and before drywall. A missed item at any of those stages can mean rework, another inspection, and a schedule gap that takes a bite out of the job’s margin.
Key Takeaways
- Your own check before the official inspection catches problems while the work is still visible and easier to correct.
- Foundation, framing, rough-in, pre-drywall and final checks help prevent failed inspections from pushing back the next trade.
- Dated photos and notes create a stronger record when an owner or subcontractor disputes what happened.
- A standardized checklist helps everyone inspect and document each job consistently.
Why Phase Inspections Protect Your Schedule and Margin
An inspection failure hits the job twice. First comes the direct cost of correcting the work. Then comes the production cost: another mobilization, extra supervision, a reinspection, and subcontractors reshuffling their calendars around a date that has moved.
A one-day correction can easily create a longer delay when the original subcontractor cannot return immediately or the inspector has limited availability. By then, the next crew may have moved to another job, leaving a gap that cannot simply be recovered the following day.
The local inspection order also affects how you sequence the work. Portland Permitting & Development, for example, requires permitted work to be inspected before it is covered by drywall, concrete, or backfill. It also requires rough electrical, plumbing, and mechanical approvals before the framing inspection. Requirements differ by jurisdiction, so the local inspection sequence needs to be mapped against the job schedule from the start.
Your estimate assumes that trades arrive, complete their scope, and move on in roughly the planned order. Every additional visit consumes labor, supervision, and overhead that may not have been priced into the job. Identifying whether the correction resulted from incomplete work, a plan change, or damage caused by another subcontractor also helps determine who should bear that cost before it becomes yours.
What to Check at Each Build Phase
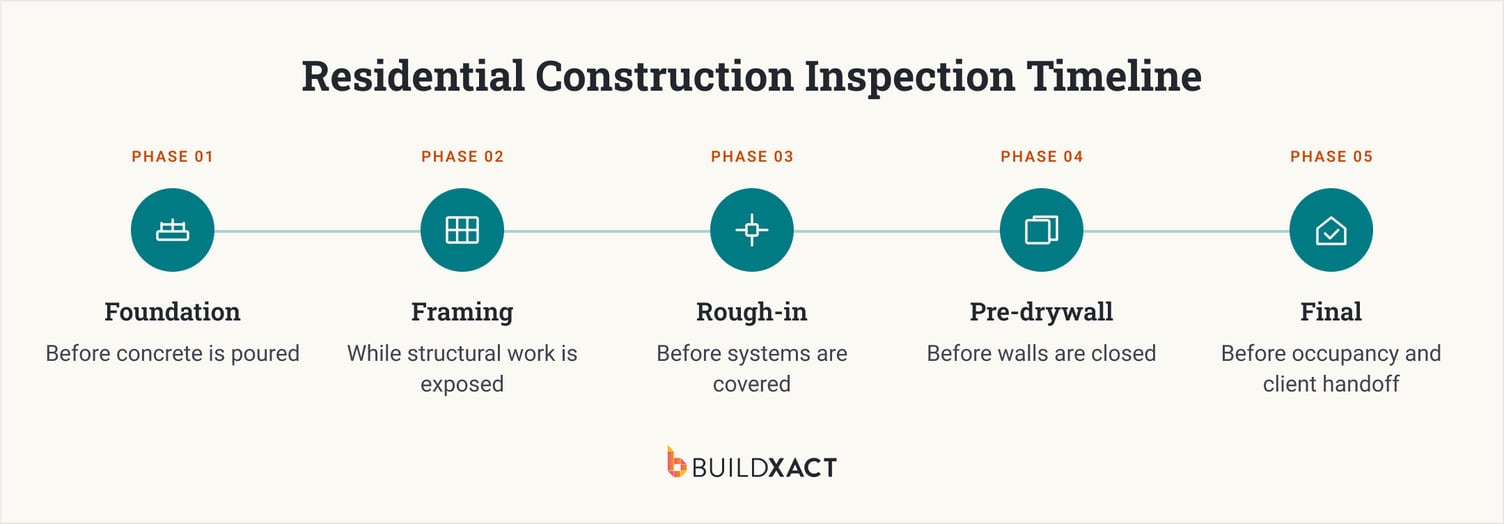
Use the checks below for your own walkthrough before scheduling the official inspection or covering the work. The IRC inspection provisions cover the main inspection stages, but follow the exact order required by your local building authority.
Foundation inspection
Run your foundation check after excavation, forms, and reinforcement are in place, but before the concrete pour. Compare the work against the approved foundation and structural plans rather than relying solely on the crew’s sign-off.
Verify:
- Building position, dimensions, setbacks, and elevations
- Footing dimensions and bearing conditions against the design
- Reinforcement size, spacing, laps, supports, and concrete cover
- Forms, penetrations, sleeves, and under-slab services
- Hold-downs, anchor bolts, straps, and embedded items
- Outstanding engineering notes or previous corrections
Confirm that the required inspection has passed before releasing the pour. Incorrect dimensions, missing reinforcement, or misplaced anchor bolts become much more expensive once the concrete is in. Corrections can involve cutting, drilling, engineering input, demolition, new materials, and another concrete pour.
While everything is still exposed, take dated wide shots of the excavation and forms, followed by close-ups of the footings, reinforcement, anchor bolts, hold-downs, and penetrations. Record any issues, who was responsible for correcting them, and the final inspection result.
Framing inspection
Before insulation or drywall starts, walk the wall, floor, and roof framing against the approved drawings. Check the load paths, connections, blocking, and rough openings, along with anything the rough trades may have drilled, cut, or moved. Close out any problems before you schdule the framing inspection.
Check:
- Wall, floor, and roof layouts
- Rough openings, headers, beams, posts, and bearing points
- Load paths, hangers, straps, hold-downs, and structural hardware
- Sheathing, bracing, and required fastener patterns
- Blocking, fireblocking, and draftstopping
- Joist, truss, and stud penetrations made by rough trades
- Approved field changes, engineering details, and open corrections
A missing connector or damaged stud is usually a manageable fix while the frame is open. Once insulation or drywall is installed, the same correction may mean opening completed work, bringing back several subcontractors, and repairing the surrounding finishes.
Photograph structural connections, braced-wall locations, fireblocking, trade penetrations and approved field changes. Tie each correction to the relevant plan detail and capture the completed fix before requesting the inspection.
Rough-in inspection
This is your last easy look at the electrical, plumbing, and mechanical systems before the walls close. Walk the pipe runs and test results, wiring and box positions, duct routes, and required clearances. Check how the trades fit together as well as whether each one has completed its own scope.
Verify:
- Plumbing supply and DWV routes, supports, and required pressure tests
- Valves, cleanouts, and fixture positions against the plans and cabinet layouts
- Electrical boxes, switches, outlets, panels, and equipment locations
- Conductor protection, nail plates, grounding, and bonding where visible
- HVAC ducts, boots, equipment access, condensate disposal and clearances
- Kitchen, bathroom, and dryer exhaust routes and termination points
- Trade clashes, framing damage and unapproved changes
Moving a box, pipe, or duct while the wall is open may only require a short return visit. Finding it behind cabinetry, tile, or a finished ceiling can involve demolition, several subcontractors and work that was never included in the estimate.
Create a room-by-room photo record of the walls and ceilings, using clear location labels and orientation shots. Attach the test results, assign each correction to the responsible subcontractor and photograph the completed work before it is covered.
Pre-drywall walkthrough
Once the framing and rough-ins are complete, do a combined walkthrough before drywall goes up. Confirm the required inspections have passed, corrections are closed and the installed work matches the latest plans and owner selections. This is also the point to deal with anything raised during an owner or third-party walkthrough.
Before releasing drywall, confirm:
- Required inspections have passed and correction notices are closed
- Approved plan changes and owner selections are reflected on site
- Backing and blocking are installed for cabinets, rails, grab bars and fixtures
- Plumbing, electrical and HVAC positions suit the finished layout
- Fireblocking, air sealing and insulation are complete at the required stage
- Damaged framing and trade clashes have been resolved
- Owner or third-party walkthrough items have been assigned and closed
The ASHI pre-drywall standard can guide the third-party walkthrough many owners request, but it does not replace your own check or the required local inspections.
Once drywall is hung, you are paying to find the issue, open the wall, correct the work and restore the finish. Before the walls close, photograph every wall and ceiling by room, including services, backing, penetrations and completed corrections. Keep the inspection approvals with the same record.
Final inspection
Before you call for the final inspection or walk the job with the client, check that the home is complete, working and ready for sign-off. Test the systems, confirm the life-safety items are in place and clear any punch list items that could hold up approval. Assign each remaining cosmetic item to a responsible person with a due date before project handover.
Verify:
- Previous inspection corrections and permit conditions are closed
- Required electrical, plumbing and mechanical finals are complete
- Systems, fixtures and installed appliances operate correctly
- Smoke and carbon monoxide alarms are installed and working
- Guards, handrails, egress components and other life-safety items are complete
- Doors, windows, locks, hardware and access points operate properly
- Inspection-critical punch list items have been resolved
- Required certificates, test results and closeout documents are ready
Anything missed at this stage can hold up approval, handover and final payment. It may also mean remobilizing a subcontractor for a small correction after their tools and crew have moved to another job.
Record the completed condition of each area, system test results, closed corrections and remaining cosmetic items. Keep the final inspection report, supporting photos and sign-off with the job record.
How to Document Site Inspection Findings
Take photos and notes while you are standing in front of the work. Trying to rebuild the record later from your camera roll, text messages, and memory is where important details get lost.
For each finding, record:
- The build phase, date, and exact location
- A wide photo showing where the issue is
- A close-up showing the problem clearly
- The relevant plan, specification, or approved change
- The trade responsible and the action required
- A follow-up photo once the correction is complete
- The official inspection result, where applicable
Keep the original finding and the completed correction together. That gives you a clear project timeline if an owner questions the work or the same problem appears later in the job.
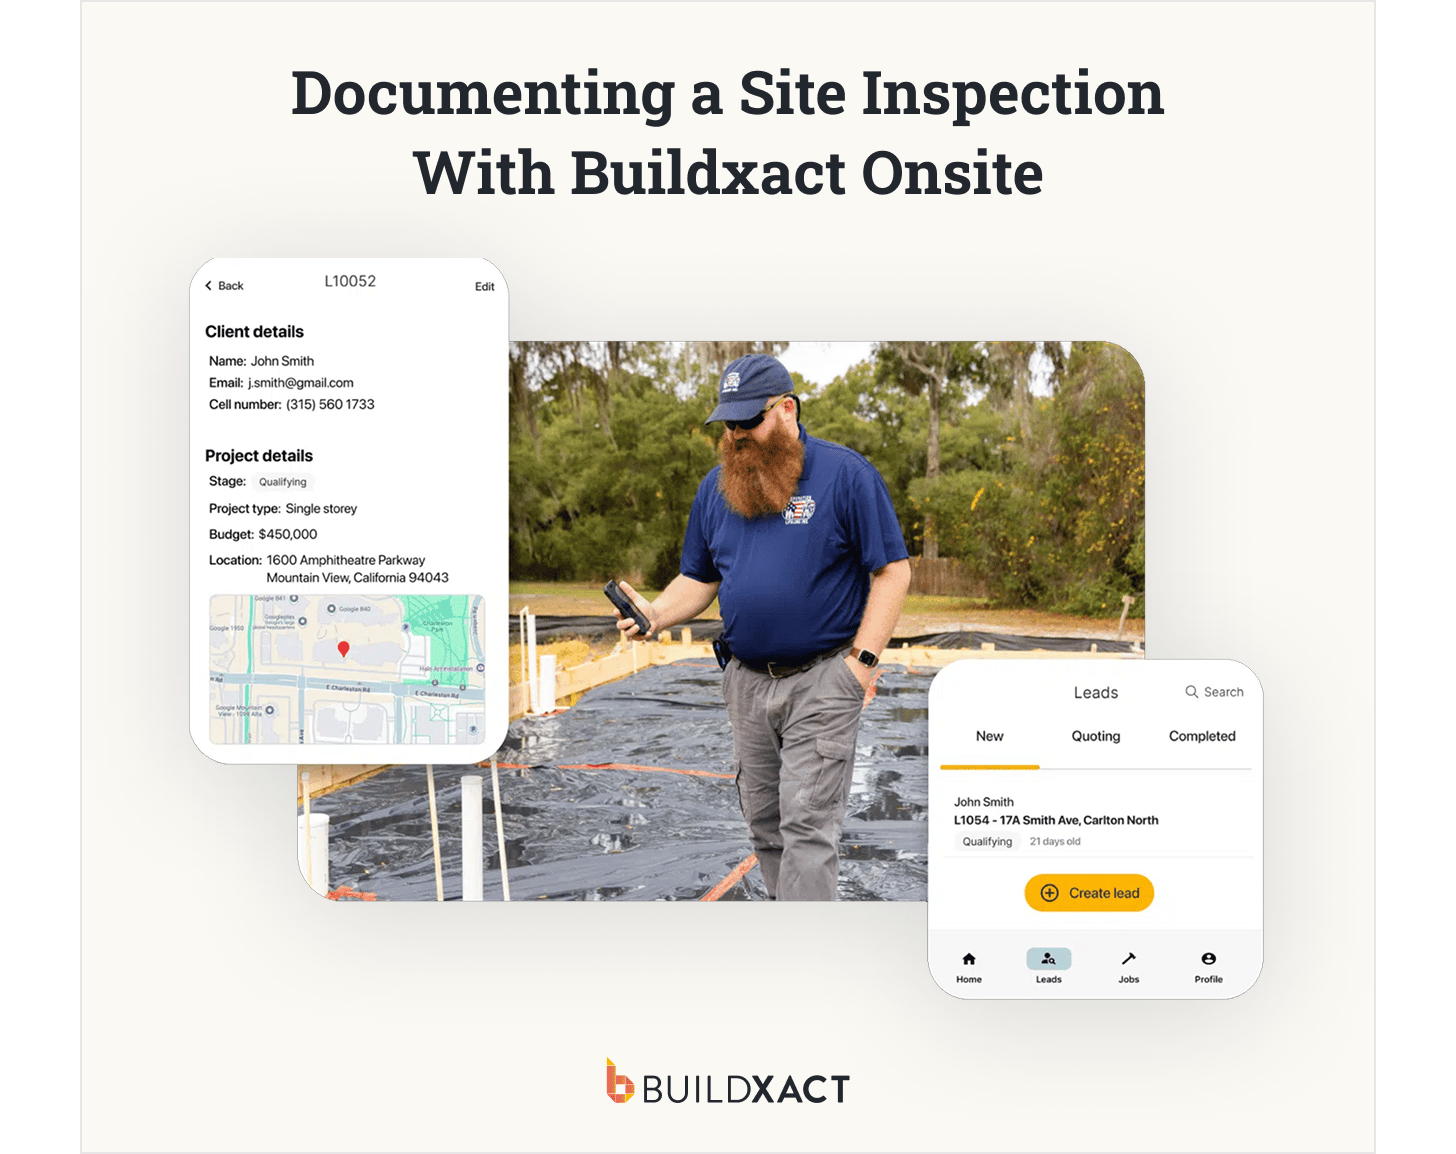
With Buildxact Onsite, you can add photos and notes to the Site Diary while you walk the job instead of moving everything across from your phone later. Your crew and subcontractors can see the findings, share updates and confirm when the work has been corrected.
Daily logs in Buildxact also keep those updates against the job, giving the office and site team one record to work from. Share the relevant findings with the owner and subcontractors so everyone has the same information.
That record becomes especially important when site findings lead to changes. Buildxact data shows builders track an average of $24,092 in change orders per job. Keeping the supporting photos, notes and approvals together makes it easier to show what changed, why it changed and who approved it.
The Site Diary supports your own documentation process. It does not replace the inspection report, correction notice or approval issued by your local building authority.
Your Phase-by-Phase Site Inspection Checklist
As your job volume grows, you won’t always be the one doing the walkthrough. This checklist gives whoever is on site a consistent way to check the quality of the work at each phase and capture what happened.
Use it before scheduling the required inspection to confirm the work is ready, attach photos and close any outstanding corrections. You will then have a clear record to refer back to if the work or cost is questioned later.
Turn Every Inspection Into a Record You Can Stand Behind
Most inspection problems are cheaper to fix while the work is still open. Running your own check at foundation, framing, rough-in, pre-drywall and final gives you a better chance of passing the first time and keeps a small correction from holding up the next trade. That means less rework, fewer unplanned return visits and less risk of the job losing margin.
The record remains useful after handover, too. Buildxact data shows builders who conduct post-project audits achieve a 7% net profit margin. Your inspection history gives you the evidence to see where rework and delays affected the job, and where your process could be improved.
The photos and notes matter just as much as the check itself. A dated record shows what you found, who corrected it and what was approved before the work moved forward. When an owner or subcontractor questions the work or the cost, you have something more reliable than a text thread to refer back to.
As you take on more jobs, that record should not depend on whose phone the photos are sitting on. See how Buildxact Onsite keeps phase updates, site photos and notes together against the job. Book a Demo.
Frequently Asked Questions
What happens if drywall goes up before the required inspection?
The local authority may require the area to be reopened so the work can be inspected. Any problems will then need to be corrected before reinspection and approval.
What should I check before scheduling a framing inspection?
Check the structural layout, load paths, connections, bracing, fireblocking, rough openings and damage from trade penetrations. Close any engineering notes and earlier corrections before booking.
How should I document a site inspection if a dispute comes up?
Record the date, phase, location, finding, plan reference and responsible trade. Add wide and close-up photos, the required correction, a completed-work photo and the official result.
Who is responsible for scheduling a construction site inspection?
It depends on the permit and local authority. The general contractor or permit holder often coordinates building inspections, while individual subcontractors may schedule inspections for their own permits.